
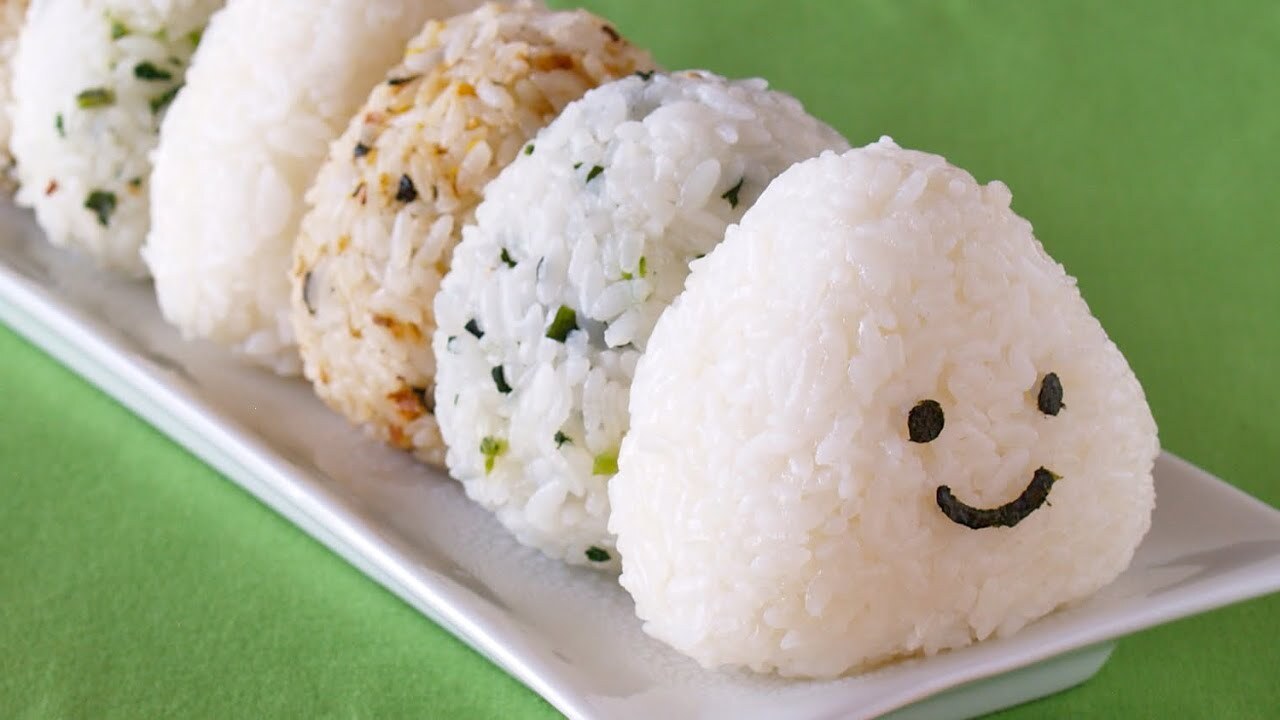
Onigiri, or Japanese rice balls, are a delightful and versatile snack that can be enjoyed at any time of the day. These handheld treats are perfect for picnics, lunchboxes, or a quick meal on the go. With a variety of fillings to choose from, onigiri can be customized to suit any taste preference.
When preparing onigiri, it's important to use Japanese short-grain rice, which has the right texture and stickiness for forming the rice balls. Nori (seaweed) is another essential ingredient that may not be commonly found in every pantry but can be easily located in the international aisle of most supermarkets. Additionally, you can get creative with the fillings, such as tuna, salmon, or pickled plum (umeboshi), which can also be found in specialty stores or the Asian section of your local grocery store.
Ingredients For Onigiri Japanese Rice Balls Recipe
Japanese short-grain rice: This type of rice is essential for its sticky texture, which helps the rice balls hold their shape.
Water: Used to cook the rice to the perfect consistency.
Salt: Adds flavor to the rice and helps preserve the onigiri.
Nori: Seaweed sheets that are cut into strips and wrapped around the rice balls for added flavor and texture.
Tuna: A popular filling option that can be mixed with mayonnaise for added creaminess.
Salmon: Another common filling, often grilled or smoked.
Pickled plum: Known as umeboshi, this traditional filling adds a tangy and salty flavor.
Technique Tip for Making Onigiri
When forming the onigiri, make sure your hands are slightly damp and sprinkled with salt. This prevents the rice from sticking to your hands and adds a subtle seasoning to the rice balls. Additionally, when adding the filling, ensure it is well-drained if using ingredients like tuna or salmon to avoid making the rice too moist, which can affect the shape and texture of the onigiri.
Suggested Side Dishes
Alternative Ingredients
japanese short-grain rice - Substitute with sushi rice: Sushi rice has a similar sticky texture that helps the onigiri hold its shape.
japanese short-grain rice - Substitute with arborio rice: Arborio rice, commonly used in risotto, has a similar starchy quality that can mimic the texture of japanese short-grain rice.
water - Substitute with dashi broth: Using dashi broth instead of water can add a deeper umami flavor to the rice.
salt - Substitute with soy sauce: Soy sauce can add a salty and umami flavor, enhancing the taste of the onigiri.
nori - Substitute with rice paper: Rice paper can be used as a wrapper if nori is unavailable, though it will have a different texture.
nori - Substitute with lettuce leaves: Lettuce leaves can be used as a fresh and crunchy alternative to nori.
tuna - Substitute with chicken: Cooked and shredded chicken can be used as a filling, providing a similar protein content.
salmon - Substitute with smoked trout: Smoked trout offers a similar smoky flavor and texture to salmon.
pickled plum - Substitute with pickled radish: Pickled radish can provide a similar tangy and crunchy element to the onigiri filling.
filling of choice - Substitute with avocado: Avocado can add a creamy texture and mild flavor, complementing the rice nicely.
Alternative Recipes Similar to Onigiri
How to Store or Freeze Onigiri
- Allow the onigiri to cool completely before storing. This helps prevent condensation, which can make the rice soggy.
- Wrap each rice ball individually in plastic wrap. This keeps them fresh and prevents them from drying out.
- Place the wrapped onigiri in an airtight container. This adds an extra layer of protection against moisture and odors.
- Store the container in the refrigerator if you plan to consume the onigiri within a couple of days. They should be good for up to 2-3 days.
- For longer storage, place the wrapped onigiri in a freezer-safe bag or container. Label it with the date to keep track of freshness.
- When ready to eat, thaw frozen onigiri in the refrigerator overnight. This ensures they defrost evenly.
- Reheat the onigiri in the microwave for about 30 seconds to 1 minute, or until warm. Be sure to remove the plastic wrap before microwaving.
- If you prefer a crispy texture, you can pan-fry the onigiri in a little sesame oil until golden brown on each side.
- Always check the onigiri for any off smells or textures before consuming, especially if they have been stored for a while.
How to Reheat Leftovers
Microwave Method:
- Place the onigiri on a microwave-safe plate.
- Cover it with a damp paper towel to keep it moist.
- Microwave on medium power for 1-2 minutes, checking halfway through.
- Let it sit for a minute before enjoying.
Steaming Method:
- Fill a pot with a small amount of water and bring it to a simmer.
- Place the onigiri in a steamer basket over the simmering water.
- Cover and steam for about 5-7 minutes until heated through.
- Carefully remove and let it cool slightly before eating.
Pan-Frying Method:
- Heat a non-stick skillet over medium heat and add a small amount of vegetable oil.
- Place the onigiri in the skillet and cook for 2-3 minutes on each side until crispy and heated through.
- Remove from the skillet and let it cool slightly before serving.
Oven Method:
- Preheat your oven to 350°F (175°C).
- Wrap the onigiri in aluminum foil to prevent it from drying out.
- Place it on a baking sheet and heat for about 10-15 minutes.
- Carefully unwrap and let it cool slightly before enjoying.
Essential Tools for Making Onigiri
Rice cooker: Used to cook the Japanese short-grain rice to perfection with the right amount of water.
Measuring cups: Essential for measuring the rice and water accurately to ensure the correct texture.
Colander: Useful for rinsing the rice under cold water until the water runs clear.
Mixing bowl: Handy for holding the rinsed rice before transferring it to the rice cooker.
Wooden spoon: Ideal for fluffing the cooked rice and letting it cool slightly.
Cutting board: Provides a clean surface for cutting the nori into strips.
Sharp knife: Necessary for cutting the nori sheets into strips.
Small bowl: Useful for holding water to wet your hands and sprinkle with salt.
Hands: The best tool for shaping the rice into balls or triangles and adding the filling.
Spoon: Helps in making a small indentation in the rice ball for the filling.
Plate: Convenient for placing the finished onigiri before serving.
How to Save Time on Making Onigiri
Prepare the filling: Have your tuna, salmon, or pickled plum ready before you start shaping the rice balls.
Use a rice cooker: Cooking japanese short-grain rice in a rice cooker ensures perfect texture and frees up your time.
Wet your hands: Keep a bowl of water nearby to quickly wet your hands, preventing the rice from sticking.
Pre-cut nori: Cut the nori into strips in advance to save time during assembly.
Batch process: Form all the rice balls first, then add the filling and wrap with nori.
Onigiri Japanese Rice Balls Recipe
Ingredients
Main Ingredients
- 2 cups Japanese short-grain rice
- 2.5 cups Water
- 1 teaspoon Salt
- 4 sheets Nori (seaweed) cut into strips
- 1 cup Filling of choice tuna, salmon, pickled plum, etc.
Instructions
- Rinse the rice under cold water until the water runs clear.
- Cook the rice in a rice cooker with the water.
- Once cooked, let the rice cool slightly.
- Wet your hands with water and sprinkle with salt.
- Take a handful of rice and form it into a ball or triangle shape.
- Make a small indentation in the center and add your filling.
- Cover the filling with more rice and reshape.
- Wrap a strip of nori around the rice ball.
Nutritional Value
Keywords
More Amazing Recipes to Try 🙂
- Chicken Milanese Recipe30 Minutes
- Painkiller Recipe5 Minutes
- Baked Chicken Wings Recipe50 Minutes
- Baking Powder Drop Biscuits Recipe22 Minutes
- Cinnamon Roll Pancakes Recipe35 Minutes
- Chinese Steamed Buns Recipe1 Hours 50 Minutes
- Cuban Bread Recipe50 Minutes
- Quiche Lorraine Recipe1 Hours 5 Minutes
Leave a Reply